Overview
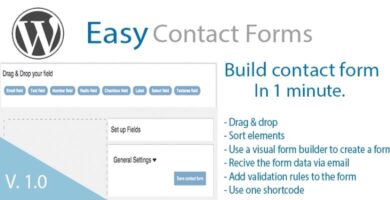
Lead form builder is a very powerful plugin used to generate leads and create forms for your website. It is an amazing form comes with many advanced features. You can easily export or import your form from anywhere. Multiple templates are given for creating forms.
Key Features:-
Drag & Drop Field ordering
Form Editing
Email Setting
Leads Management
Lead Receiving Method
Easy to Embed
Fully Responsive
File Uploads
Multiple Form Templates
Lead Export
Form Export & Import
Form Customize
Support
Features
Live Customizer
SMTP Mail Configure
Google reCaptcha
Admin Email Settings
User Email Settings
Form Import / Export
Lead Export
MailChimp Addon
Drag and Drop field ordering
File uploading
Multiple Form Templates
Requirements
WordPress 4.7+
Instructions
Lead Form Builder
As you already know about our free WordPress plugin Lead form builder lite, Now we are going to give you our pro plugin of Lead form Builder with many advanced features. This doc will help you in running our pro plugin easily for your WordPress site.
Installing the plugin via WordPress Dashboard:-
- First download the Plugin from member’s area.
- Just upload the lead-form-builder.zip to the Dashboard > Plugin > Add new, and then activate it.
Creating Form :-
- For creating a new form just go to “dashboard > Lead Form > Add Form”. Add Field Name, Field Type, Default Value, Use Default Value as a Placeholder (check this option to show default value inside fields), Required (Check this option to make that particular field mandatory/required), Add New Button (Click to add more fields).
- You can also choose the Drag and Drop field ordering : To order form fields just drag and drop fields.
- After doing this save it, now your form is created.
Displaying Form :-
- You can create unlimited forms and display on Page, Post and Widgets. To display form at page/post just copy shortcode from ” Dashboard > Lead form “. And paste it in the page/post editor (Text editor).
- To display form in the any area. Drag and drop “Lead Form Builder” widget in your desired area and add form shortcode in it.
Email Setting :-
This section lets you customize lead receiving and lead sending detail.
- Admin Email: Here you can set “To” which email id admin want to send mail and “From” which email id admin want to receive mail. For sending the leads detail with your email you should the put shortcode in the message body and you can write any message too.
- User Email: Here you can set “From” which email id you want to send email to user after form submitting. You can also set whether you want to send email to the user or not.
Captcha Setting :-
- To stop spamming you can add Google Recaptcha at your form. Just go to “Captcha Setting” tab and generate a site key and secret key by clicking a “Get your Keys.”
- You can also Turn On/Off this option.
Setting :-
- Lead Receiving Method: Form contain three lead receiving options Receive leads in email, Save leads in database (You can see all leads in the view leads), Receive leads in email and save in database.Receive leads in an email: – By using this option you can receive your leads in your mail which you have set in the email setting. Save leads in database: – By using this option your all the leads will receive and save in your database which can be seen in the database. Receive leads in email and save in database:- By using this option leads will receive in your mail and will also save in database.
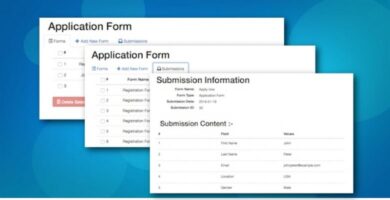
View Leads through Form :-
- Once you have created your form and display it at the page or post.
- You can remember your form and on clicking show all column you are able to see more fields of your contact form which is submitted by a client.
- If your fields are more than five columns the other fields will be display when you click on views.
Advanced settings :-
MailChimp
As MailChimp is a simple email marketing software (EMS) which gives you a number of easy options for designing, sending and saving templates of your emails. We are giving you this option in our plugin, you can simply add your MailChimp API KEY and save it.
SMTP mail configure
SMTP is used for sending and receiving email. You can use On/Off when you fill all the data in the SMTP form. For know about in detail you can go with our Doc of SMTP.
Lead Export
Here you can add the starting and ending date of your leads and you can easily export them. You can export unlimited leads and save them.
Form Import
Through form import you can import any form from anywhere you want. As you want another form in place of your form which you are using.Just click on the option import form and import the XML file of the form you want in the place of your form, here it will replace the form.
Form Export
By using this option you can export your form easily. Just click on export form, you can export unlimited forms using this option.
Form customization
This is the most important section here seven options settings are given I will define them one by one so it will easy for you to understand:-
Form Size
Here you can change the form width % according to your need.
Header Setting
You can change upload a header image or set the heading color. Through the alignment, you can put your heading in left, right or center. Hide or show your heading and set the font size. You can also set the Top/Bottom Padding and Left/Right Padding of the heading.
Background Setting
You can upload an image in the background of your form or set a background color.Through form padding, you can set the padding % at top, bottom, right or left in your form.
Field color Setting
Here four options are given:-Label Color, Border Color, Background Color and Placeholder Color. You can set the colors of these sections.
Submit button Setting
Here also four color options are given for submit button Text Color, Background Color, Hover Background Color and Hover Background Color. Through border alignment, you can set the submit button left, right or center. You can also change the text size %, Top/Bottom Padding % and Left/Right Padding % of the submit button.
Custom CSS
Here you write your custom CSS for your form other than the existing options.
Reset all Customization will reset your form styling and give you a default form for customization.