Overview
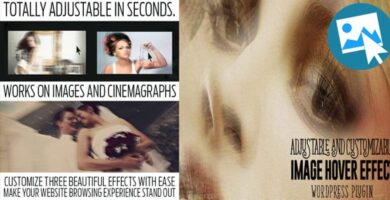
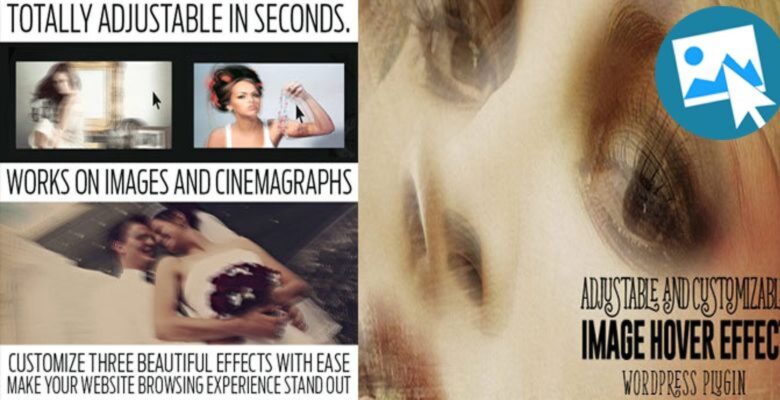
Make your wordpress website more appealing by using our WP plugin to animate your thumbnails, images and animations on rollover. From very subtle-to very aggressive, these 3 effects will make a difference in your visitor’s browsing experience.
Highly customizable in seconds, use our built-in Visual Interface straight from the Editor. Just browse for a photo and pick some values. It will start straight out of the box, with our pre-inserted values that you can change.
Features
- Browse for image in seconds
- Choose one of 3 effects to apply
- Adjust movement, rotation, (X,Y and Z)
- Add Link URL’s (on click)
- Add Border (of any thickness)
- Optionally start as grayscale until rolled over
- Resize to ANY size (optional)
- Fit inside the space provided or Crop
- Stay inside or move outside the area
- and more…
Instructions
You don’t have to edit all the values – but you can customize the effect by doing so. Experiment with different number of extra images (layers), their opacity, X, Y, Z movement and rotation (try setting Y to 0 and give Y a higher value for horizontal movement only).
You can optionally set width and height (and control the size of image regardless of the original size), you can choose to fit the space provided or to crop it, you can add border (of any thickness), you can have the image in grayscale until you rollover.
Also there are THREE main effects that control the movement. ONE is the most subtle, but artistic. TWO is a bit more aggressive, also very smooth and pretty. THREE is a jumpy effect that will definitely get noticed. By combining different values for rotation, movement, opacity, etc you can generate some beautiful visual effects. Use it on every thumbnail or image on your site, or just on the large header photos for artistic appearance – it’s up to you.
INSTEAD OF GENERATING THE SHORTCODE VIA BUTTON IN THE TEXT EDITOR, YOU CAN WRITE SHORTCODES YOURSELF EASY:
shortcode: [wpdp_effect]
Attributes:
‘effect’ => ‘one’,
‘grayscale’ => ‘no’,
‘move_x’ => ‘-15’,
‘move_y’ => ‘-15’,
‘move_z’ => ’20’,
‘rotate_x’ => ’15’,
‘rotate_y’ => ’15’,
‘rotate_z’ => ’10’,
‘opacity’ => ‘0.5’,
‘extra_imgs’ => ‘4’,
‘overflow’ => ‘visible’,
‘width’ => ‘300px’,
‘height’ => ‘300px’,
‘fitscreen’ => ‘no’,
‘link’ => ‘#’,
‘border’ => ‘1px’,
‘target’ => ‘_self’
extra_imgs (Extra Images / Layer) :
Minimum value of extra_imgs is ‘1’ and the maximum number of extra_imgs is ‘5’.
overflow:
‘visible’ : Extra images on mouse hover will be sticking out from the border.
‘hidden’ : Extra images on mouse hover will not b sticking out from the border.
width:
for adjusting the width of the image (e.g “300px”)
height:
for adjusting the height of the image (e.g “300px”)
fitscreen:
for adjusting the whole image in a box. (e.g “yes”)
NOTE:
*if you add ‘fitscreen’ attribute and then you see the image is stretching or pixelate then you can adjust it by applying `width` and `height` attributes.
*if you don’t add ‘fitscreen’ and your image is cropping.. then you can also adjust it by adding only ‘width’ & ‘height’ attributes