Info
Overview
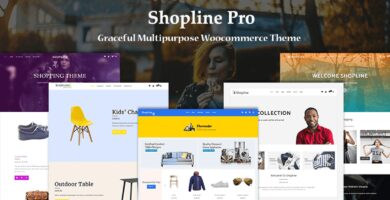
Shopline pro theme is a fully responsive multipurpose shopping theme. This theme comes with unlimted features which is best suitable for creating any type of shopping website. Shopline theme includes unlimited color and widget options for each section. You can on/off the auto play of the slider and set the slider speed too. Category filter is available which will help in setting the categories you want to show on your site. Another one is product filter in which select the category product or the recent product. Easily able to show your product in a grid or boxed layout and set the number of the product. Also show Ad videos or images on the site. Theme supports one of the most powerful feature which is Mega menu which allows you to show your all the elements present in your site.
Features
– Powerful Mega menu
– Section On/Off & Ordering
– Advanced Typography
– Front Page Hero
– Inner Page Hero
– Product slider Section
– Page container size
– Custom Page Templates
– WooCommerce category slider
– WooCommerce product section
– Ribbon section
– Banner Section
– Latest blog section
– Testimonial section
– Three Column featured Image
– WooCommerce widget support
– Shop pages
– Fact Counter section
– Instagram section
– Two Custom section
– Unlimited color
– Gradient Color design
– SVG design
– Section overlay color
– Slider on/off & slider speed
– Brand section
Requirements
WordPress 4.9+
Instructions
Installing Theme
First, download the Shopline theme zip file from the member’s area.Login to WordPress dashboard. Go to “Appearance > Theme”.Click on “Add new” button and then click on “Upload theme” button. Here upload theme zip file.Activate the theme.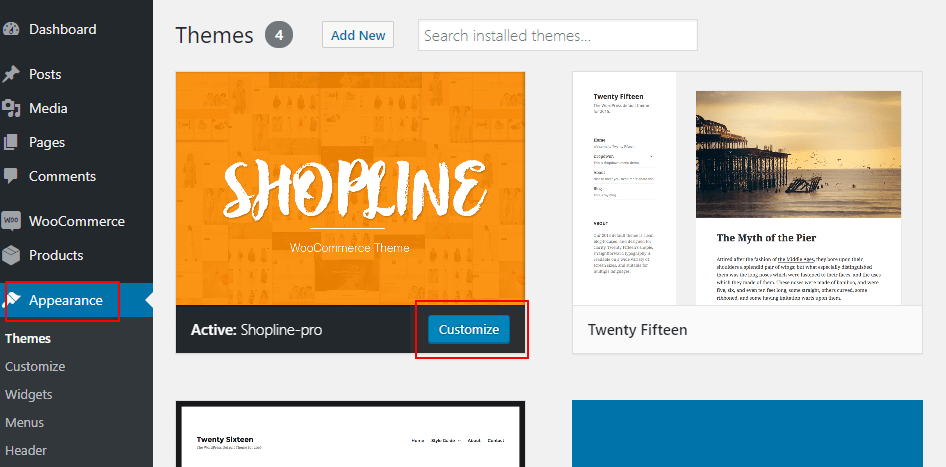
For our Shopline theme, you need to install the required plugin –
Woocommerce
- Login to WordPress Admin panel.
- Go to Plugin > Add new.
- Search Woocommerce plugin in the search box and activate the plugin, installation is done.
YITH Woocommerce wishlist
- Again Go to plugin > Add new
- Search YITH Woocommerce wishlist and activate the plugin, installation is done.
How to Set Homepage
- For creating Homepage on your site follow the below instructions –
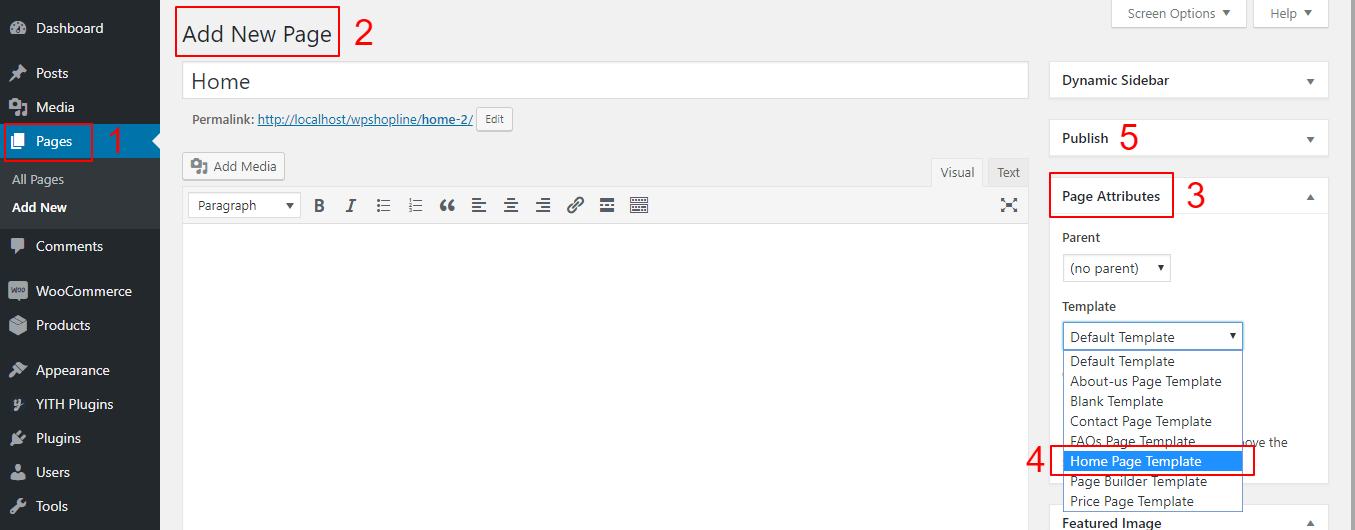
- Go to Wp Dashboard > Page > Add New > Create a Page.
- In the right sidebar of your editor you will see Page attributes > Template. Click on the template and select the option Homepage template. Publish it.
- Navigate to Customize panel. In homepage settings. Select the radio button of A Static page and choose your homepage which you have created as front page.
Dummy Data Hide/Show
- Go to Wp Dashboard > Customize > Dummy Data Hide/Show. This setting allows you to Hide or Show the dummy data of theme.

Site Identity
- To display Site logo or site title tagline and site icon on your site.
- Dashboard > Appearance > Customize > Site identity.
- Logo– Upload a logo image with specific width and height.
- Site Title & Tagline – Display site title & tagline in-place of Logo.
- Site Title & Tagline Show/Hide – Check on the radio button display site title and tagline.
- Site Icon – You can upload a site icon for your browser.
- Typography – You can change the typography of site title and site tagline.

Menu Setting
Section Scrolling Menu
To add Scrolling menu please follow the below steps –Go to WP Dashboard > “Appearance > Menus” and create a new custom menu.Add new link from “links” tab.Here you need to add section id in “URL” field.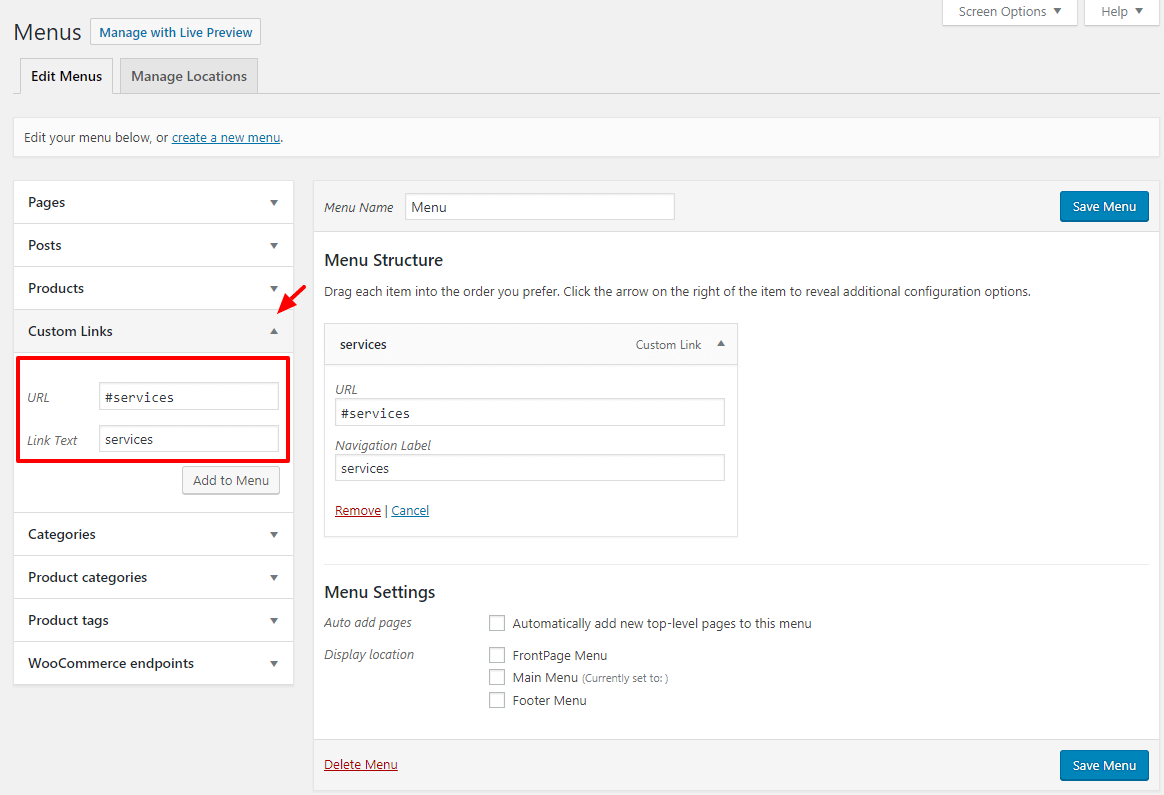
You can put below id’s for section scrolling menu.
- Woocommerce category slider – #category_section
- Ribbon section – #ribbon_section
- Service section – #services
- Woocommerce Product section – #featured_product_section
- Woocommerce Product slider – #featured_product_section1
- Banner section – #hot_deal_section
- Testimonial section – #testimonial_section
- About us – #aboutus_section
- Latest blog section – #post_section
- Fact Counter – #counter
- Woocommerce widget section – #best_sell_section
- Three column featured – #hot_sell_section
- Brand section – #brand_section
Front Page Menu
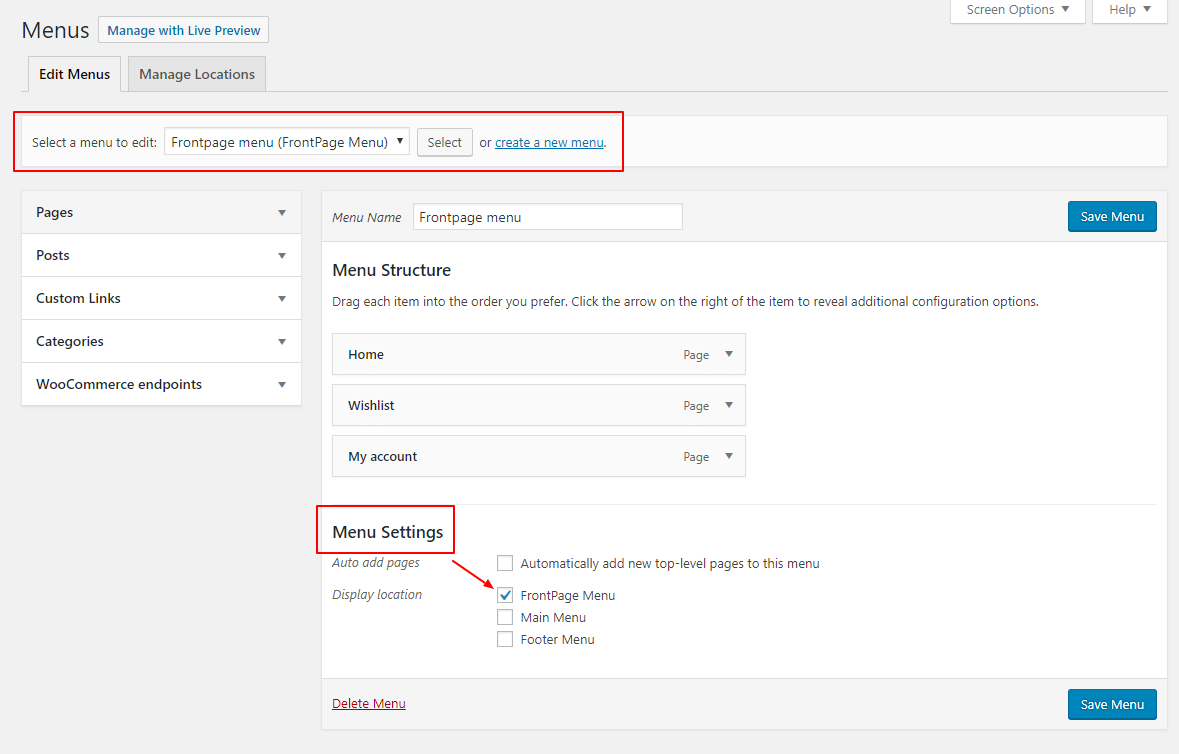
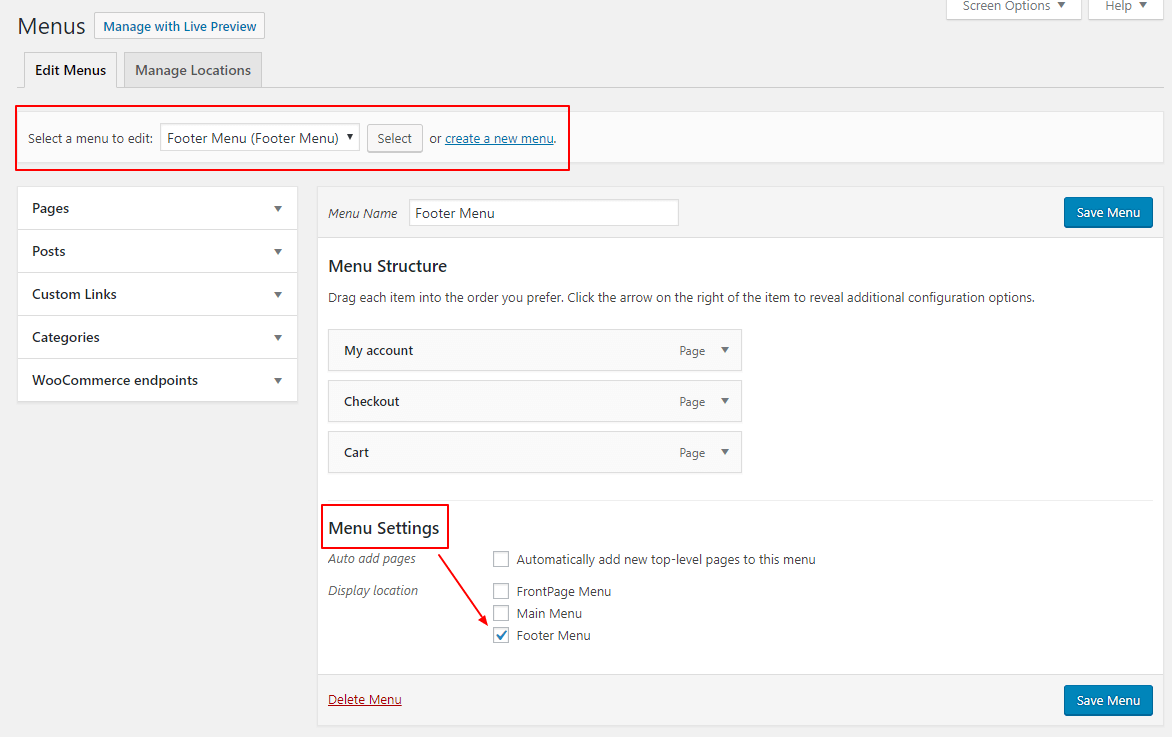
- Go to WP Dashboard > Appearance. For showing your menu in front page header on your site. Navigate to Menus > Create menu > Menu Settings. Here three menu options – Frontpage Menu, Main Menu and Footer Menu.
- Now select “Front Menu” as a Theme Location for Section Menus. Display Menu on front page header.
Main Menu
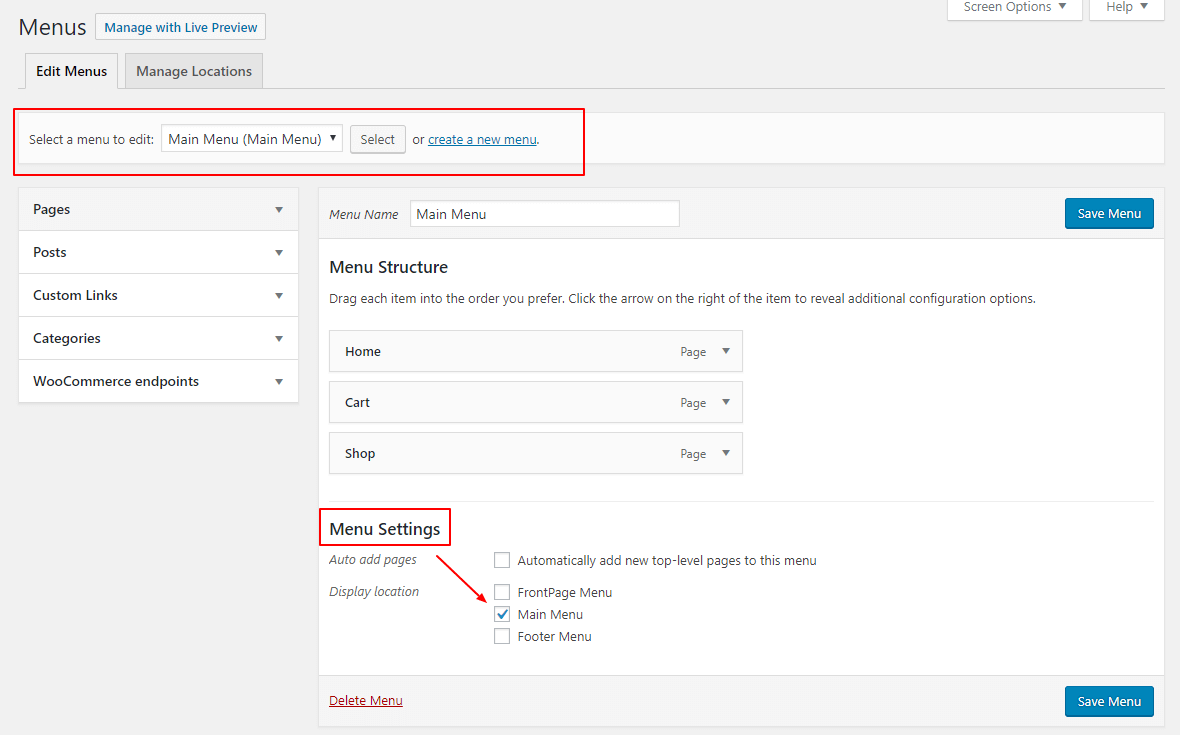
- Go to WP Dashboard > Appearance. For showing your menu in inner pages on your site. Navigate to Menus > Create menu > Menu Settings.
- Now select “Main Menu” as a Theme Location for Section Menus. Display Menu on inner pages header.
Footer Menu
- For showing your menu on footer. Navigate to Menus > Create menu > Menu Settings.
- Now select “Footer Menu” as a Theme Location for Section Menus. Display Menu on Footer section.
Mega menu
- Go to Appearance > Menus. Add a page, category, or custom link.
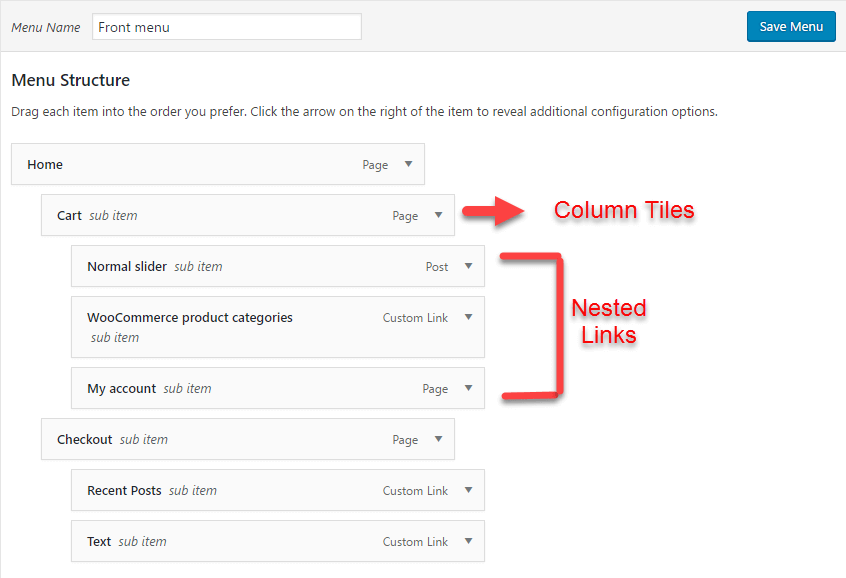
- You can create multi column menus, add custom links, page, widgets, post, category in a parent & dropdown menu and change WordPress menu style. This allows you to set additional parent links and submenus (nested menu) within the drop-down menu. You can see more links all at once.
- Mega menu setting – On the “Dropdown Column” option panel select the Mega menu and save menu. The menu in which you have selected the mega menu is parent menu.

- You can set the header titles above the nested links. You can do this by adding the another level of nested links under the initial nested links. See the below image to do this.
- Color option – Just go to Customize > Header setting > mega menu color, you can pick the color of text, link, text and hover color from here.

Appearance Setting
- All changes made in appearance setting will be applied on whole site.
- Go to Appearance > Customize > Appearance Setting.

Global Typography
Go to Appearance > Customize > Appearance Setting > Global Typography.
You can add typography on your site. Here multiple google font families are available.
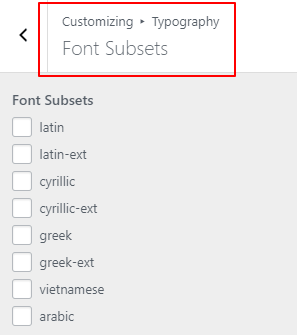
- Font subsets – You can use multiple font subsets for your site.
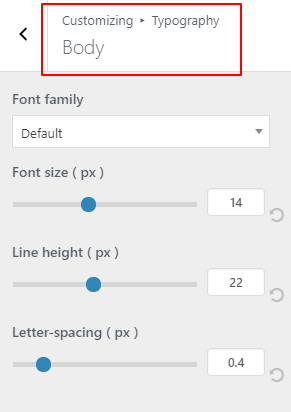
- Body – Choose Font family for body of site. Adjust the font size, line height and letter spacing.
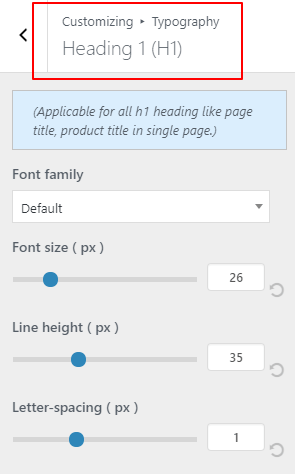
- Heading (H1) – This will be applicable for all h1 heading like page title, product title in single page. Choose font family and adjust the font size, line height & letter spacing.
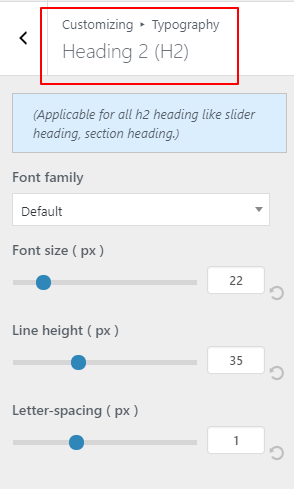
- Heading (H2) – This will be applicable for all h2 heading like slider heading, section heading. Choose font family and adjust the font size, line height & letter spacing.
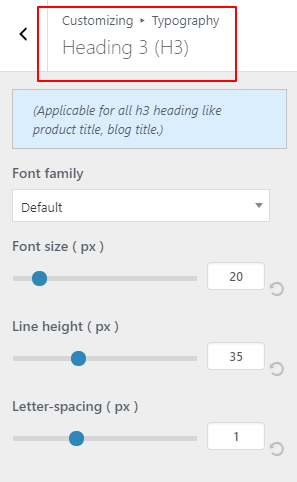
- Heading (H3) – This will be applicable for all h3 heading like product title, blog title. Choose font family and adjust the font size, line height & letter spacing.
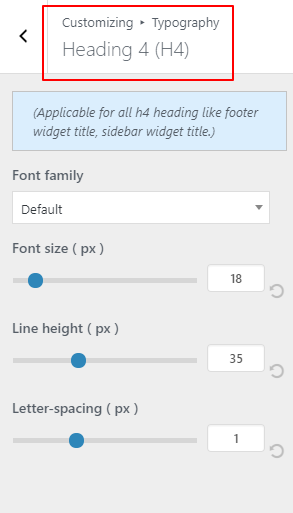
- Heading 4 (H4) – This will be applicable for all h4 heading like footer widget title, sidebar widget title. Choose font family and adjust the font size, line height & letter spacing.
- Heading 5 (H5) – This will be applicable for all h5 heading. Choose font family and adjust the font size, line height & letter spacing.
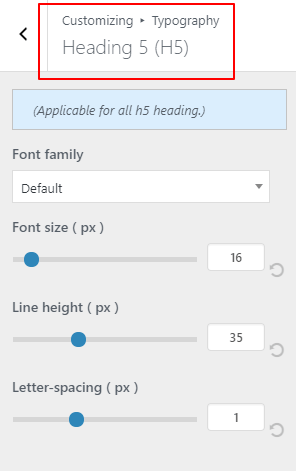
- Heading 6 (H6) – This will be applicable for all h6 heading. Choose font family and adjust the font size, line height & letter spacing.

Global Setting
- Go to Appearance > Customize > Appearance Setting > Global Setting.
- Parallax Effect – Parallax effect is given in each section for image. If you want to disable it just check the box.
- Animation Effect- Animation effect is given for slider on homepage. If you want to disable it just check the box.
- Hide back to top button – You can enable or disable back to top button on your site.
- Site Loader – Disable or enable the site loader.

Page Container Setting
- Go to Appearance > Customize > Appearance Setting > Page Container Setting.
- Set the size (in pixels) for all templates. It will be easy for you to manage the width of your site. By default 1200px has been set. It is the maximum size for homepage and inner pages width.
- You can also enable the boxed layout for your site.

Theme Color
- Go to Appearance > Customize > Appearance Setting > Theme Color.
- Theme Color- Using theme color you can pick the color for those items whose color option is not given.
- Background color – You can pick the background color of inner pages.
- Header Background Color – You can pick header bg color and set the color overlay transparency for header image.

Header Options
- Go to WP Admin > Appearance > Customize > Header Options.

- In Header option section you can change the styling of your header, front page and inner page.
Header Setting
- Go to WP Admin > Appearance > Customize > Header Options > Header Setting. .
- Setting – In header setting you can disable the fixed header, set the header layout and if you want transparent header just check the box (this will be applied for front page template only). You can show last added menu in a custom menu button. You can set the background color and also give color to each element.

- Style – In style you can pick color for each element.

Front Page Hero
- Go to Appearance > Customize > Header option > Front Page Hero .
- Here you can set the styling of front page.
- Setting – Select the height for your front page header using the scroll bar. Choose the hero layout. Six different layouts Slide show, Product show, Color, Image, Video, Gradient and one more option is External plugin if you want to add any slider plugin you can and show your slides. Compatible with all slider plugin
Image Slider – You can show up-to 5 slides in front page header and also manage the slider speed.
Product Slider – You can show Product slider in your front page. For product slider setting go to Product” class=”redactor-linkify-object”>https://themehunk.com/docs/sho… slider setting.
Color – Pick desired color for your front page header with color transparency.
Image – Upload any background image in front page header.
Video – Upload any video with poster image. You can also mute your video.
Gradient – Nine different gradient style for your front page. 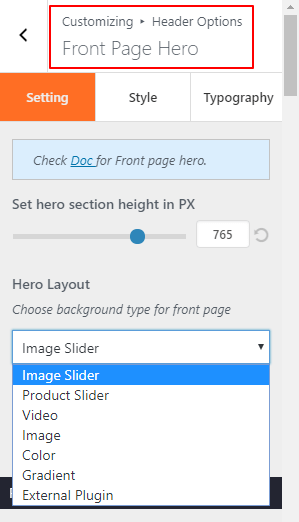
Style – Choose overlay color or gradient. Twelve different gradient are there and you can pick color for each element too. 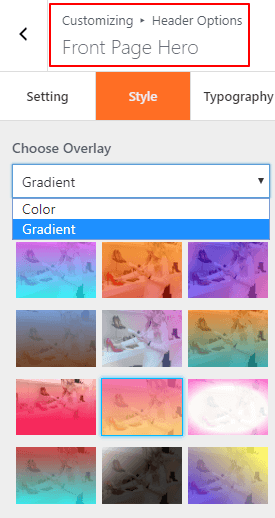
Typography – Here you can choose desired typography for this section. 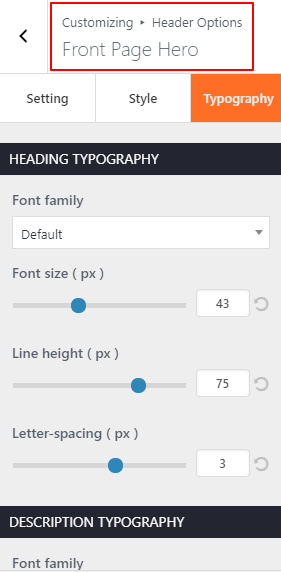
Inner Page Hero
- Go to Appearance > Customize > Header option > Inner Page Hero .
- Here you can set the styling of inner pages.
- Setting – Select the height for your inner page header using the scroll bar. Choose the hero layout. Five different layouts Slide show, Color, Image, Video and No header.
Image Slider – You can show up-to 3 slides in your inner page header and also manage the slider speed.
Color – Pick desired color for your inner page header with color transparency.
Image – Upload any background image in header.
Video – Upload any video with poster image. You can also mute your video.
No header – If you don’t want to show any image, color r video you can select the option no header. 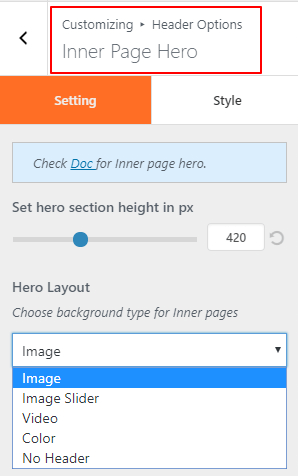 Style – Choose the overlay as color or gradient. different overlay designs are given.
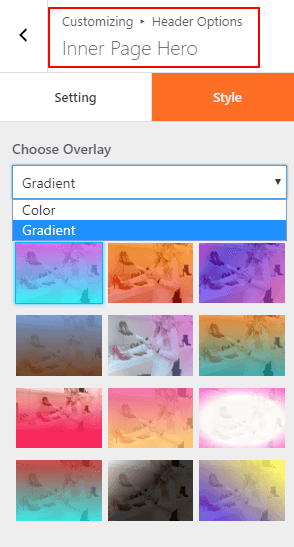
Product Slider
- This section will be enable only when you will select “Product Slider” from front page hero.
- Product slider – It will show product in the slider section. You can change the background, color and filter your product.

(Note; Product type – Featured Product, Recent Product & Sale Product are given. Featured Products are those products which you have set as featured ( Specific) while creating the product. Recent products are those products which you have added recently in your product section. Sale products are those which you have selected for sale.)
Style – You can pick color for each element. 
Typography – Here you can choose desired typography for this section. 
Frontpage section
- Go to Appearance > Customize > Frontpage section.

Category Slider
- Go to Appearance > Customize > Frontpage section > Category Slider.
Your products will display only when your WooCommerce plugin is activated. So make confirm that you have installed WooCommerce plugin ( https://wordpress.org/plugins/… ).In category slider you can show your category product with two different layouts – Slider and tile view. Create Category. Navigate to Appearance > Customize panel > category slider. Choose your desired category from category section and show the products in slider. 
Style – You can change the Style in your section. Typography – Choose the Font family, change the Font size, Line height and Letter-spacing (px) of each element.
Service Section
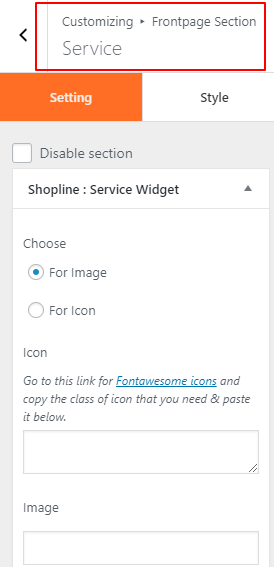
- Go to Appearance > Customize > Frontpage section > Service section.
- Show your services in service section. Go to Appearance > Customize > Service. Add your desired icon from font awesome icon or upload an image of your service with styling. Pick color for your background and adjust the section padding of top and bottom.
Ribbon Section
- Go to Appearance > Customize > Frontpage section > Ribbon section.
- You can add image, video, color with svg, color in this section. Section can be easily disable with disabling heading and sub-heading.

Style – You can change Style in your section. Typography – Choose the Font family, change the Font size, Line height and Letter-spacing (px) of each element.
Product Slider (WooCommerce)
- This section uses the WooCommerce plugin to display products. So make confirm that you have installed WooCommerce plugin (
https://wordpress.org/plugins/… ).Using product slider you’ll be able to show your products in a slider. Navigate to Customize > Frontpage section > Product slider. Select the product slider widget from widget area.
Style – You can change Style in your section.
Product Section(WooCommerce)
- Go to Appearance > Customize > Frontpage section > Product Section (WooCommerce) . This section uses the
https://wordpress.org/plugins/…” rel=”noopener” target=”_blank”>WooCommerce plugin to display products. So make confirm that you have installed WooCommerce plugin ( https://wordpress.org/plugins/… ).In this section you can show your category product and recent products in a grid layout. 
Style – You can change Style in your section. Typography – Choose the Font family, change the Font size, Line height and Letter-spacing (px) of each element.
Banner Section
- Go to Appearance > Customize > Frontpage section > Banner Section .
- In this section you can show your banner ad. Two different layout options – Layout one and Layout two. In first layout you can show two banner ad images with image overlay color and links. In Second layout you can show five banner images with tile design. You can pick the hover color and link to each image.

Style – You can change Style in your section.
Testimonial Section
- Go to Appearance > Customize > Frontpage section > Testimonial section.
- Testimonial section will help you to show testimonials or reviews of your client. Add heading, sub-heading and adjust the slider speed.
- Choose testimonial widget. Here you can add author image, author name, testimonial text, website url and link. You can add unlimited testimonial in it.

Style – You can change Style in your section. Typography – Choose the Font family, change the Font size, Line height and Letter-spacing (px) of each element.
AboutUs Section
- Go to Appearance > Customize > Frontpage section > AboutUs section.
- Display about your company through about us section. Go to Appearance > Customize > About us. You can upload an image an in the right column and description in the left column. Go to customize > front-page > About us section.

Style – You can change Style in your section. Typography – Choose the Font family, change the Font size, Line height and Letter-spacing (px) of each element.
Latest Blog Section
- Go to Appearance > Customize > Frontpage section > Latest Blog .
- Latest blog section allows you to show the your blog. Go to Appearance > Customize > Latest blog. You can choose latest category, change the text of button, autoplay on/off the slider.

Style – You can change Style in your section. Typography – Choose the Font family, change the Font size, Line height and Letter-spacing (px) of each element.
Three Column Featured Section
- Show your featured images on your site. Go to Appearance > Customize > Three Column Featured Section. Upload up to Three images with image link.

Style – You can change Style in your section along with overlay of each image. Typography – Choose the Font family, change the Font size, Line height and Letter-spacing (px) of each element.
Brand Section
- Go to Appearance > Customize > Frontpage section > Brand .
- Go to Brand section > Setting. Choose Brand widget from widget area. Upload your brand image and link. This a brand slider you can also adjust the slider speed.

Style – You can change Style in your section. Typography – Choose the Font family, change the Font size, Line height and Letter-spacing (px) of each element.
Fact counter Section
- Go to Appearance > customize > Frontpage section > Fact counter Section .
- Choose the Fact counter Widget from widgets in which you can set the title, icons, minimum and maximum value.

Style – You can change Style in your section.
- Typography – Choose the Font family, change the Font size, Line height and Letter-spacing (px) of each element.
Woocommerce Widget Section
- Go to Appearance > Woocommerce Widget Section > Setting.
- In this section, you can put unlimited Woocommerce widgets from widgets.
Style – You can change Style in your section.
Custom Section
- Go to Appearance > Customize > Frontpage section > Custom Section.
- Custom section 1
- Custom section 2
- In custom section just add any desired widget from the widget area.
Style – You can change Style in your section. 
Newsletter Section
- Go to Appearance > Customize > Frontpage section > Newsletter section.
- You can easily show newsletter on homepage of your site. Just download the Lead form builder plugin from WordPress. Crete a form and put the shortcode in the text area. Now your newsletter form will show on your site and your visitors will easily contact you.

Style – You can change Style in your section. Typography – Choose the Font family, change the Font size, Line height and Letter-spacing (px) of each element.
Section Ordering
- Go to Appearance > Customize > Frontpage section > Section Ordering.
- Drag and drop any section and change its position according to your need.

Shop page Setting
- Go to Dashboard > Pages > Shop Page .
- For creating shopping products. Navigate to Wp dashboard > Products > Add new. Here create products, fill all the fields and choose category for them.
- Choose four different grid layout to show your product.
- It allows you to show single product page. You can set the product page left, right or with no sidebar. Choose the product page layout and number of product. Color option will allow you to put desired color in product page.

- Style – Change the color of each element.
- Typography – Here you can choose typography for your section.
Custom Page Templates
About Us Template
- For about us page template. Go to Dashboard > Page > Page attributes > About us page template. Now publish page and click on the browser link > customize. Now you are able to see the about us template in customize panel.
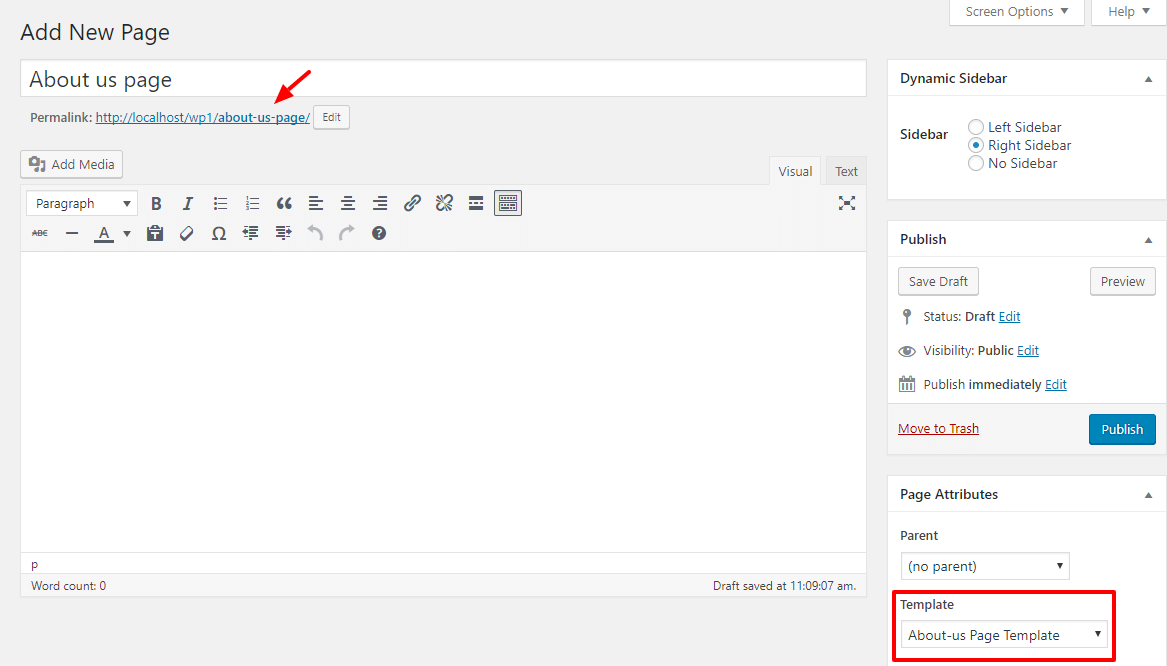
- About service – In about service you can add services by using service widget in which you can add icons, title, description, link and color to each element. Add heading description text along with their color.

- About Team – You can add team members in page using team widget. Just select the team widget here you can add member image, designation, link and give color to each element. You can also add heading, sub-heading with their color.

- About Skill- Just choose the skill widget and add skill title, percentage along with the desired color. You can also add heading, sub-heading and their color too.

FAQs Page Template
For FAQs Page template. Go to Dashboard > Page > Page attributes > FAQs Page template. Now publish page and click on the browser link > customize. Now you are able to see FAQs Page template in the customize panel. 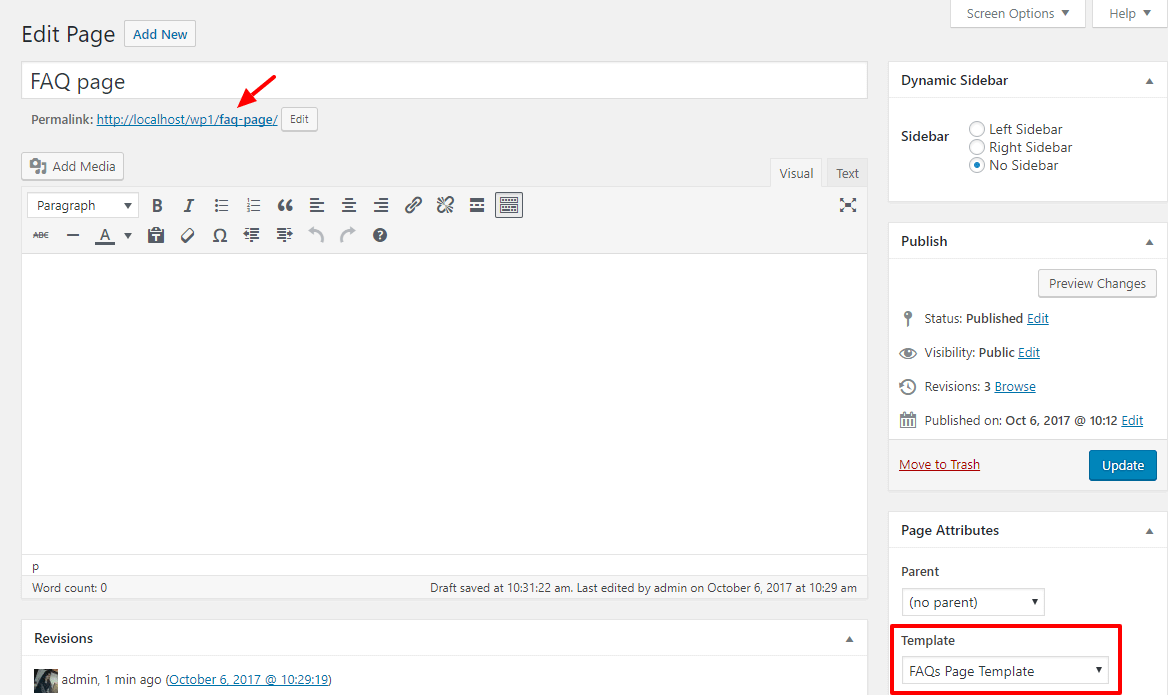
Navigate to Customize panel. In FAQs Page template just add a FAQs widget and you are able to put question & answer in site. 
Price Page template
For Price Page template. Go to Dashboard > Page > Page attributes > Price Page template. Now publish the page and click on the browser link > customize. Now you are able to see the Price Page template option in customize panel.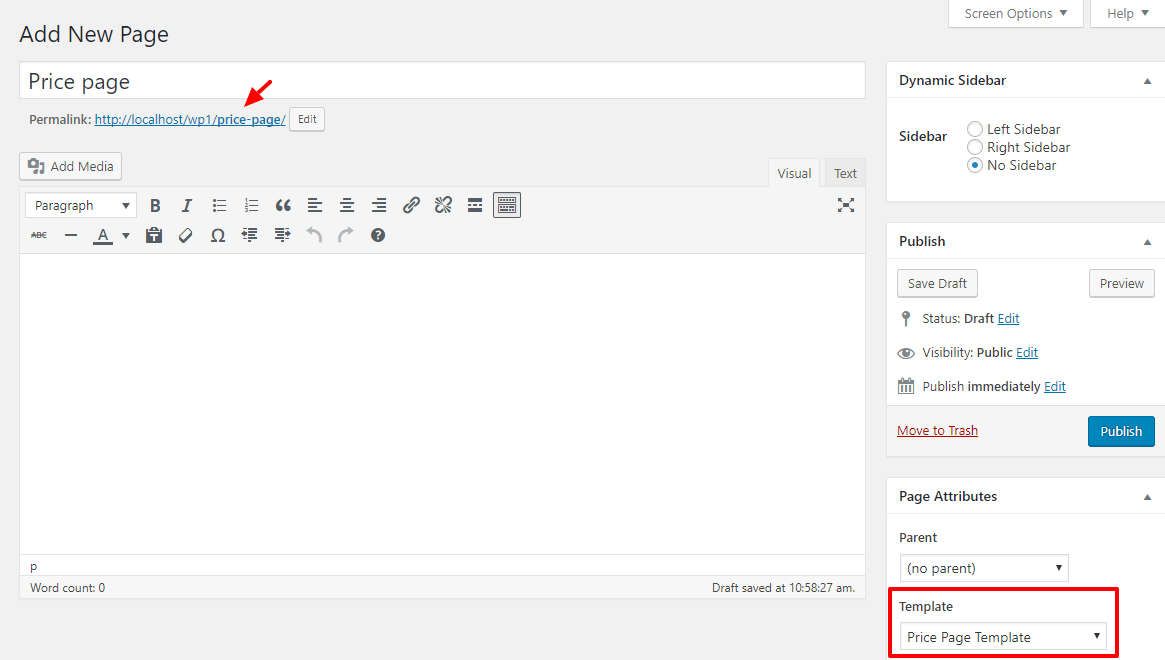
In price page you can show pricing table by just selecting the price widget. you can show your items with heading, price and currency. You can also pick color in the background and for other elements from style. . 
Contact Page template
For Contact Page template. Go to Dashboard > Page > Page attributes > Contact Page template. Now publish the page and click on the browser link > customize. Now you are able to see the Contact Page template option in customize panel.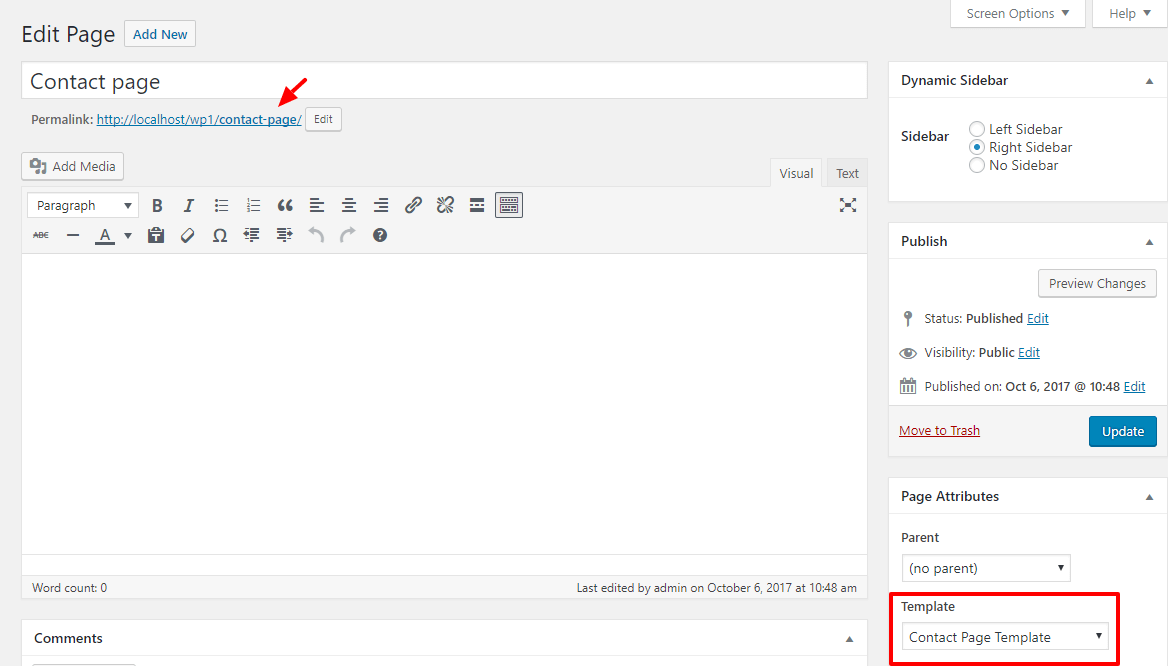
In contact page you can show the Map on your site and you can add contact form using lead form builder plugin. Just add the shortcode of form and fill other fields with bg color then you are able to show a contact form on page by style. 
Page builder template
For Page builder template. Go to Dashboard > Page > Page attributes > Page builder template. Now publish the page and click on the browser link > customize. Now you are able to see the Page builder template option in customize panel. You can create multiple pages using the page builder plugin in site. Just use the any WP builder plugin Like: SiteOrigin, Elementor, Visual Composer, Beaver Builder and many other for creating pages.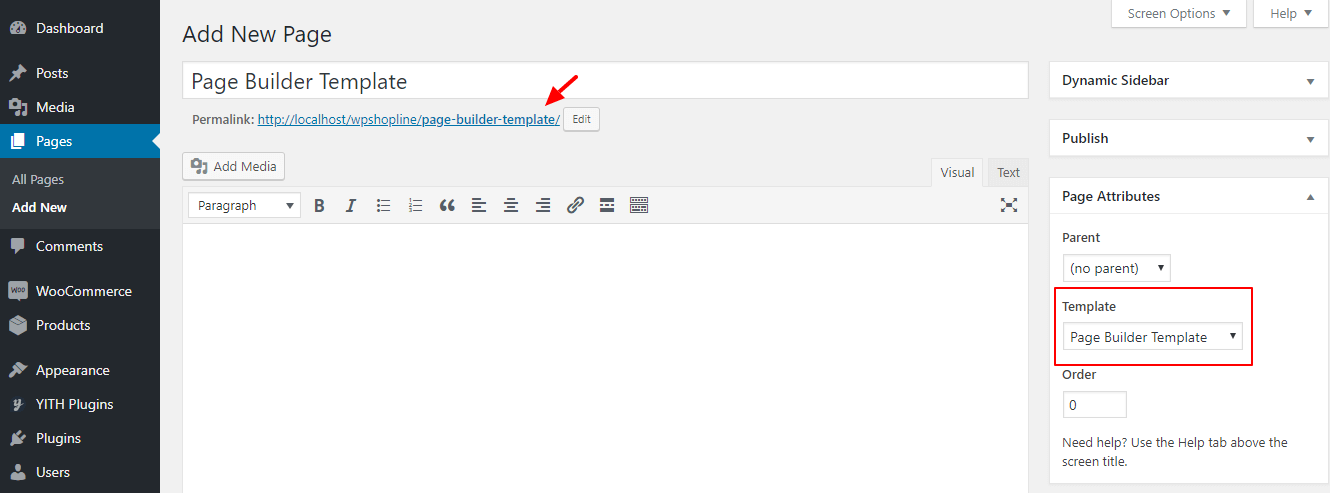
Blank Page template
For adding blank template on your site. Go to Dashboard > Page > Page attributes > Blank page template. If you want to hide header and footer from page just use this template. This will only show content on the page. You can use any page builder template on this page.
Footer Setting
- Go to Appearance > Customize > Footer setting.
- Upload a footer logo which will be shown in the footer top section.
- Put a copyright text in text area.
- Add social icon profile links.
Add Newsletter by using our plugin lead form builder . Just install this plugin and create an awesome newsletter subscription form for your site. You can also show widgets in your footer. For adding widget. Navigate to Widgets option and choose your desired widgets. 
Style – You can change Style in your section.
Style Setting
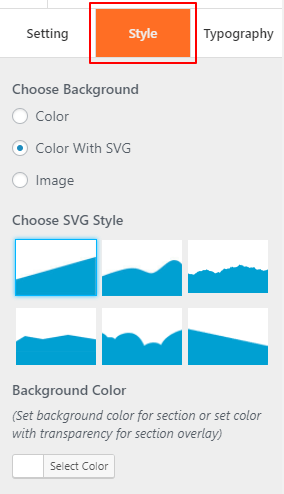
- Theme contain Style for each section. In style you can pick background color, choose color with SVG (two different design) and color for each element.
- If you want to show color in your background. Just select the radio button of color and pick desired color from the color box or put the color code.
- Show Color with SVG design in your section. Select the radio button of Color with SVG and choose your desired design of SVG.
- You can show background image, just select the radio button of Image, upload an image here and set the overlay transparency.
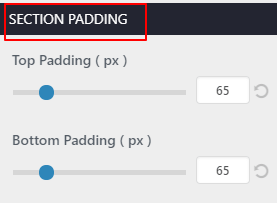
- Using Section padding you can adjust the top padding and bottom padding (in px).
- Note – For Service section you can only choose background color and In Ribbon section you can also choose video for your background.
How to Create Category and Product
- Go to WP dashboard > Product > Category.
- Add name, slug, choose parent category, description and upload a thumbnail image.
- Now navigate to products, here add your product and choose desired category for showing your product on site.
- Category will be shown in your category slider and products in product section, product slider as well as in shop pages.
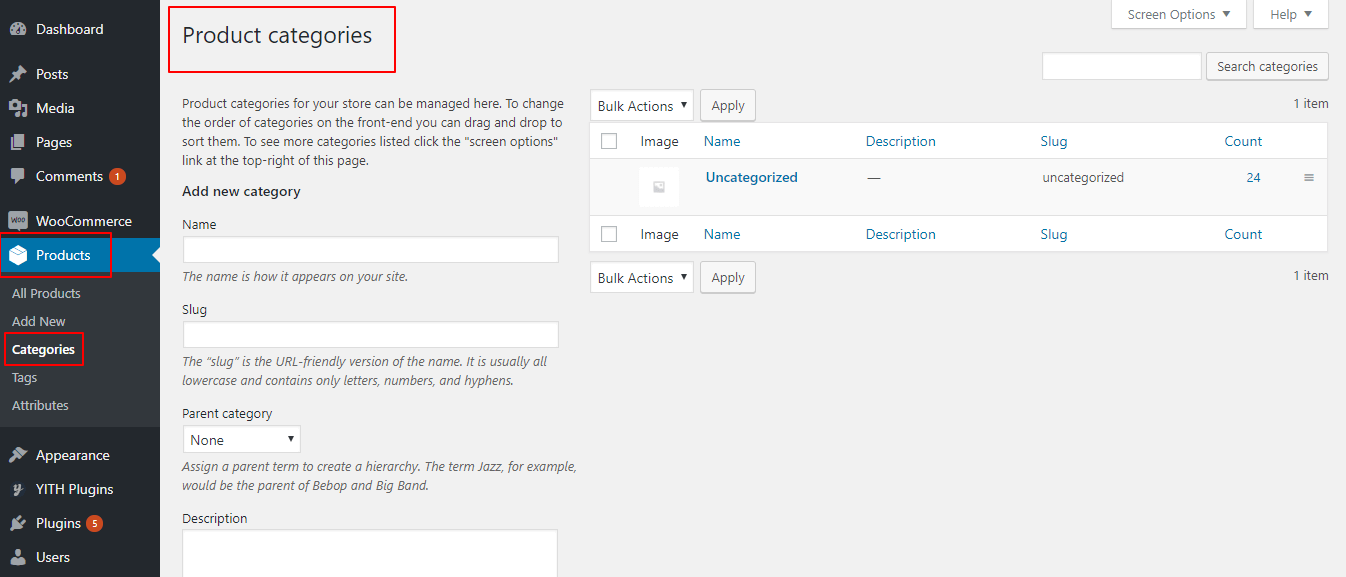
Note – For showing Product on your site WooCommerce plugin is must.
Product Image Size
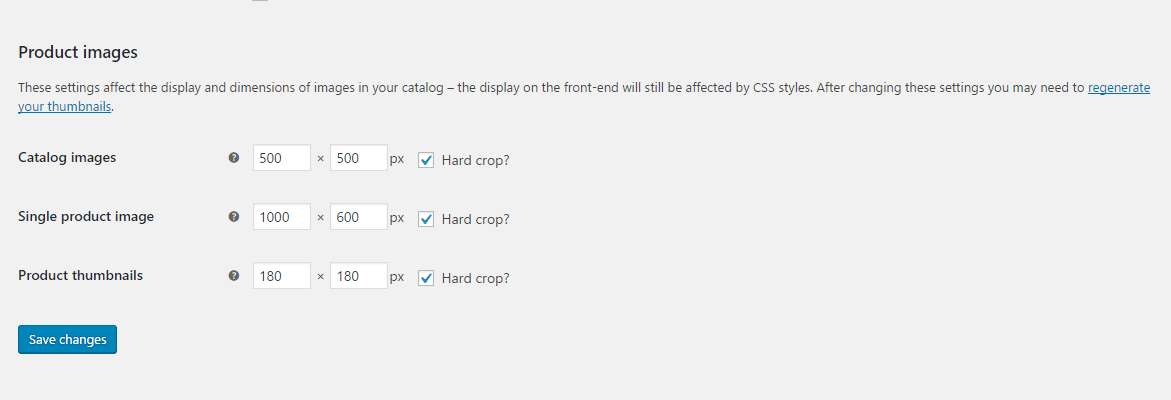
- You can easily set the product image size. Just go to Dashboard > WooCommerce > settings.
- Select Product tab and click on Display, Scroll down to change the parameters for the following options: Catalog image, Single Product image, Product Thumbnails.
- Catalog image will change the size of homepage product/category images. Whereas Single product image will change the size of single/description page of product.
- In order to re-size previously added images, you can use the extension to re-generate the thumbnails.

Additional CSS
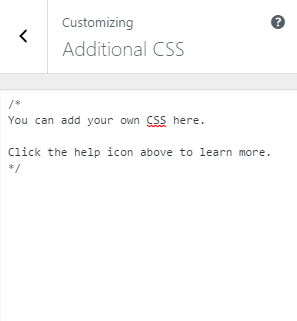
- To add additional CSS go to “Appearance > Customize > Additional CSS and simply put your CSS here.
For more information you can contact our support team at support forum.

