Info
| Name | Smart Ringtone App Android Source code |
| Market | codester.com |
| Category | Miscellaneous |
| Tags |
Overview
Ringtone Smart App with AdMob
Step by Step User Guide
- Created: 15/03/2016
- By: kimodev
Contents in Source Folder
After purchasing the application source code and extracting, you will find the following folders:
- Install APK
- Project
- Readme
Install APK: Contains the RingtonesApplicationTemplate.apk application file. You can test run it in your Android device. Project: Contains the application source code which you have to import into Eclipse and build the application. Readme: An elaborate readme guide with instructions on how to use this file to successfully build your Android applications.
Getting Started
Before starting to use this source code and developing app you need to first install the following softwares to your computer. If you have already installed these softwares you can skip this step.
1. JDK 5 or above: Install Java Development Kit (JDK) 5 or greater. You can download here.
2. Eclipse IDE: You can choose Eclipse Indigo or other packages. I personally prefer Indigo. You can download here. Extract the zip file into a folder for example D:ANDROIDEclipse after downloading. Run eclipse.exe. On first time you will be asked for workspace directory. It is a directory where you want your android project to be stored. For now just create new folder Workspace in D:ANDROID or any other directory as you wish.
3. Android SDK: Install android sdk. You can download here. Now you need to connect Eclipse and Android sdk. On Eclipse GUI, select Windows > Preferences menu on top. Select Android and then locate your SDK Location, on my machine it is D:ANDROIDandroid-sdk, and then click Apply.
Importing Project into Eclipse
1. Extract the downloaded archive that you have purchased in Envato.
2. Open Eclipse > Select File > Import.
3. In the Import window page select Existing Projects into Workspace under General and click Next. In the next window choose Select archive file. Press the Browse button and choose RingtonesTemplate.zip file present in the Project folder. Click Finish.
4. Your project will be visible on the Package Explorer. At the left side you can see the project folder. You can edit your files from here.
Changing Package Name
You need to change package name in the .java files (src folder), and android manifest.
Replace in java files: Totally there are 14 .java files in src folder. Open all these .java files in Notepad++ and replace the package name: ringtones.Ronaldev with a package name of your choice in all files at once. E.g. ringtones.funnytones.
Do not select “Match case”. You can see 32 occurrences getting replaced.
AndroidManifest.xml: Replace the package name. Only one package definition is there at the top.
You may find it little hard to replace in first try, but in few attempts you can do it. For experienced users this is a simple task.
Adding/Deleting Sound Files
Put your sound files in res>raw folder. Give the corresping name for the sounds in the file zeallist.txt. It is present in the same folder. The name given in zeallist appears in the app.
To delete a sound just remove it from raw folder and remove name from zeallist.txt.
Changing App Name
Go to res/values/ directory and edit strings.xml file.
To change App name: Enter the name in the below string.
| 1 | <string name="app_name">Ringtones</string><br /> |
Changing App Icon
The application icon is present at res/drawable-(density)/ic_launcher.png. You can see ic_launcher.png in the following folders: drawable-ldpi, drawable-mdpi, drawable-hdpi and drawable-xhdpi. The same image is placed in different sizes.
Create your icon image with the same file name and replace the existing files. Refresh the project for changes to take effect.
Changing Splash Screen
The splash image is located in the res/drawable-hdpi/splash.png folder. You can simply replace the image.
Enabling AdMob Ads
Open res > layout > ringtonelist..xml
Scroll down to the bottom. You can see the AdMob code given below.
| 1 2 3 4 5 6 7 | <com.google.ads.AdView android:id="@+id/adView" android:layout_width="wrap_content" android:layout_height="wrap_content" ads:adUnitId="MY_AD_UNIT_ID" ads:adSize="BANNER" ads:testDevices="TEST_EMULATOR, TEST_DEVICE_ID" ads:loadAdOnCreate="true" /> |
Specify your Ad unit id in the below code for the ads to appear. If the ad unit id is not provided then AdMob doesn’t load ads.
| 1 | ads:adUnitId="MY_AD_UNIT_ID" |
Compiling the Application
After customizing this app, you need to compile into an .apk file that can be installed in Android devices. Here are the steps of compiling this application.
1. Select the RingtonesApplicationTemplate project in Package Explorer, Right click and select Export.
2. In Export window select Android > Export Android Application. Then, click Next button.
3. Your project name will appear in Project: box. If not, click Browse and find. Click Next button to proceed.
4. Select your keystore or create a new one. In Location, click Browse button to decide keystore name and the location of it. Give a strong password and proceed to next step.
5. Fill the key creation form and press Next.
6. Finally, click Browse button to specify the location where you want to have the generated apk, and then click Finish. Now your application is ready. Install it. Have fun.
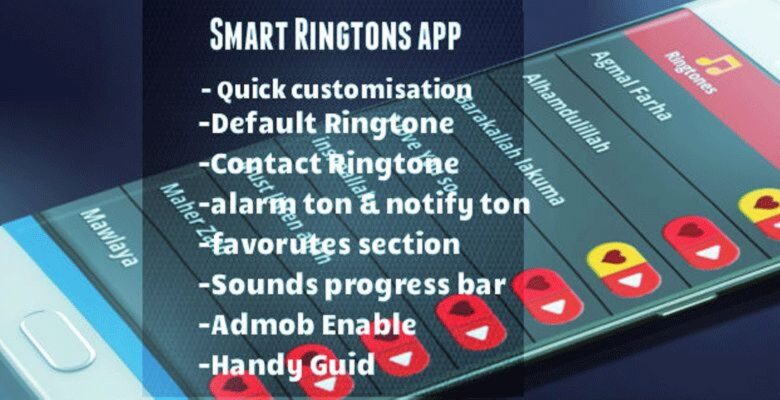
Features
- Quick customization
- Default Ringtone & Contact Ringtone
- alarm ton & notification ton
- favorites section
- Sound Progress bar
- addmob Enabled
- Handy Guid