Info
| Name | MasonryGrid Pro – Responsive WordPress Theme |
| Market | codester.com |
| Category | Miscellaneous |
| Tags | ecommerce, fluid, gallery, Grid, grid layout, masonry, responsive, video, vlog, woocommerce |
Overview
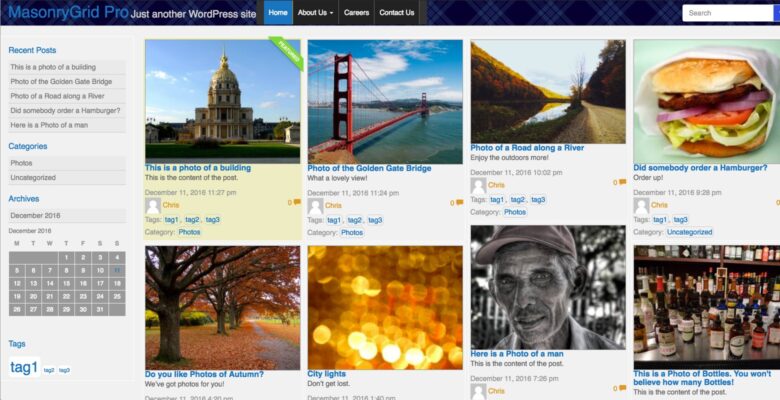
Built on the Bootstrap CSS framework, the MasonryGrid WordPress theme offers a vast array of customization options. Every element’s background color, border color, text color, link color can be changed in the WordPress Customizer located in the Admin. Change the number of posts to show per row per screen size (desktop, tablet, mobile). Add plugin functionality or navigation in the 9 widget areas (header, right sidebar, left sidebar and footer). Choose from multiple header layouts.
Features
- Grid Layout for Maximizing Space on Pages – Show more posts in less space
- Easy Customization of Page Elements – No need to edit CSS files. No coding knowledge needed
- Multiple Header Layouts – Arrange navbar and widgets in header
- Left and Right Sidebars with Widget Areas in each – Change sidebar widths in WordPress customizer
- eCommerce-Ready! Works with WooCommerce and other shopping cart plugins
- 9 Widget Areas for adding plugin functionality
Requirements
- WordPress Version 3.8 or higher
Instructions
Upload Theme via WordPress Admin
- Download the theme to your computer.
- Go to your WordPress Admin at your_server/wp-admin
- Click Appearance > Themes
- Click Add New
- Click Upload Theme
- Click Choose File and select the Theme zip file you’ve downloaded.
- Click Install Now
- Click Activate
Upload Theme via FTP
- Download the theme to your computer.
- Unzip the downloaded file. This should reveal the Theme folder.
- Open your FTP client and connect to your web server.
- Locate the downloaded Theme folder (ensure it is unzipped first).
- Upload the Theme folder to your_server/wp-content/themes folder.
- Once it’s uploaded, login to your WordPress Admin at your_server/wp-admin
- Click Appearance > Themes
- Locate the Theme, hover over it and click Activate.